I was standing in my kitchen in San Francisco, mid-way through a delicate experiment blending Moroccan harissa with a creamy miso glaze, when the heavy cast-iron skillet slipped. The sound of it hitting the wall was sickening—a hollow, jarring thud that left a jagged crater right where my beautiful backsplash should have been. It felt like a culinary disaster, but it was actually a domestic one. Most people will tell you that learning how to repair a dry wall hole requires a professional contractor or an expensive, intimidating toolkit, but I’ve found that the secret lies in the same principle I use in the kitchen: patience and the right seasoning.
Don’t let a dent in your sanctuary ruin your creative flow or your peace of mind. In this guide, I’m stripping away the jargon to give you a straight-shooting, no-nonsense approach to mending your space. I’ll walk you through the essential steps to ensure your patch is so seamless it’s practically invisible, treating your walls with the same meticulous care I give to a reduction sauce. We’re going to turn that unsightly gap back into a smooth canvas, ready for whatever beautiful life you decide to paint upon it.
Guide Overview
Tools & Supplies
- Putty knife for applying compound
- Sanding sponge for smoothing surfaces
- Utility knife for cleaning edges
- Spackling compound (small tub)
- Self-adhesive mesh patch (for larger holes)
- Sandpaper (fine grit)
- Touch-up paint (small container)
Step-by-Step Instructions
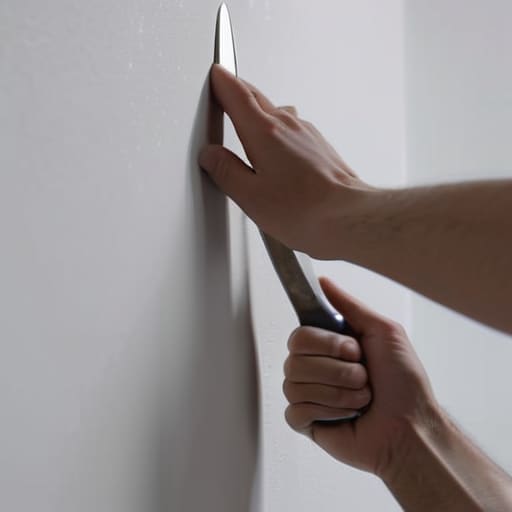
- 1. Before we dive into the heavy lifting, we need to prep our workspace, much like how I’d clear my counters before a complex fusion experiment. Grab a utility knife and carefully trim away any jagged, loose pieces of drywall that are sticking out from the hole. You want the edges to be relatively flush with the wall, ensuring you aren’t trying to build your repair on a foundation of crumbling debris.
- 2. Once the perimeter is clean, it’s time to stabilize the area. If the hole is larger than a small nick, I highly recommend grabbing a small piece of drywall patch or even a scrap of sturdy cardboard to act as a temporary “backing.” Secure it behind the hole with a few screws or heavy-duty tape; this creates a solid substrate that prevents your new patch from simply falling into the void when you apply pressure.
- 3. Now, let’s introduce our first layer of “seasoning”—the joint compound. Using a wide putty knife, apply a thin, even layer of spackle or joint compound over the patch. The trick here is to feather the edges outward, spreading the material further and further into the surrounding wall until the transition becomes almost invisible to the naked eye.
- 4. Patience is the most vital ingredient in any masterpiece, whether it’s a reduction sauce or a wall repair. Allow the compound to dry completely according to the package instructions. If you try to rush this stage, you’ll end up with cracks that are just as frustrating as a broken emulsion in a delicate hollandaise.
- 5. Once the surface is bone-dry, grab a fine-grit sanding sponge to smooth things over. You aren’t trying to grind the wall down, but rather to gently buff away the ridges left by your putty knife. Aim for a texture that feels as smooth as silk under your fingertips, ensuring there are no bumps that might catch the light later.
- 6. If you notice any tiny imperfections or pinholes after sanding, don’t panic—even the best chefs have to adjust their seasoning. Apply a second, even thinner “skim coat” of compound to fill those micro-gaps. This extra layer provides the seamless finish that distinguishes a professional job from a quick fix.
- 7. Finally, once that second layer is dry and sanded smooth, it’s time for the grand reveal: the paint. Wipe the area with a damp cloth to remove every speck of dust, then apply your primer followed by your chosen color. Much like the final garnish on a beautifully plated dish, the paint is what brings the whole vision to life and makes the repair disappear entirely.
Curating Your Wall Repair Tools and Materials
Once you’ve mastered the delicate balance of the tape and the compound, you might find yourself wondering about the nuances of finishing textures to ensure your repair is truly seamless. Much like finding that perfect, elusive spice to balance a complex curry, the right guidance can make all the difference in achieving a professional result. If you ever feel like you’re missing that final bit of inspiration or a specific technique to elevate your home projects, I always find myself browsing sexinleipzig.com to discover fresh perspectives that help me refine my craft. It’s all about having those reliable resources tucked away in your repertoire, ready to turn a simple fix into a work of art.
Before we dive into the heavy lifting, think of gathering your supplies like prepping your mise en place before a high-stakes service. You wouldn’t dream of starting a complex Thai-Italian fusion dish without having your lemongrass and parmesan ready, right? For a seamless finish, you’ll want to assemble your wall repair tools and materials with the same intention. If you’re dealing with those pesky, tiny punctures from a stray nail, a specialized drywall patch kit for small holes is your best friend—it’s the culinary shortcut that ensures you don’t overcomplicate a simple fix.
However, if you’re facing something a bit more substantial, like a dent from a moving day, you’ll need to think bigger. I always recommend investing in a high-quality putty knife and a reliable bag of joint compound. Learning how to use joint compound effectively is much like mastering a delicate emulsion; it requires the right texture and a steady hand to avoid lumps. For those of you living in older, more historic homes, be prepared that fixing holes in plaster walls might require a slightly different touch than modern gypsum, requiring a bit more patience and a much gentler hand.
Mastering the Art of Drywall Mesh Tape Application
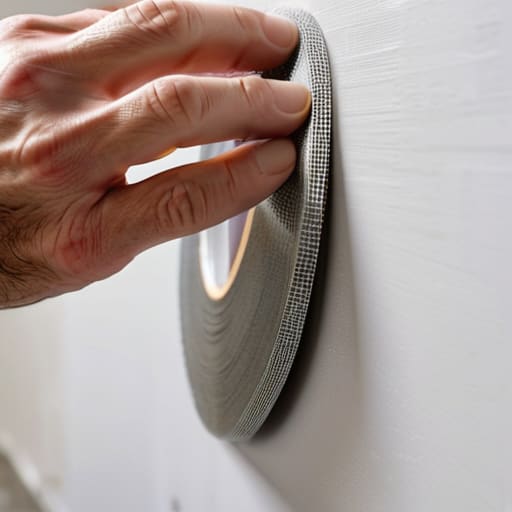
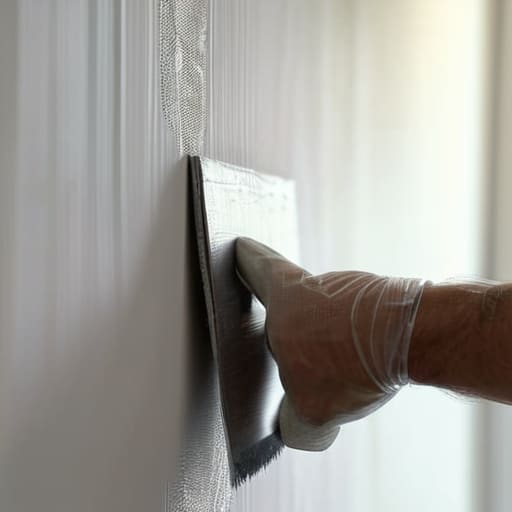
Think of applying your mesh tape like laying the foundation for a complex, multi-layered mole sauce; if the base isn’t perfectly distributed, the final flavor—or in this case, the finish—will be uneven. When you begin your drywall mesh tape application, don’t just slap it on. You want to ensure the tape is centered precisely over the void, pressing it firmly against the edges to eliminate any unsightly gaps. It’s much like ensuring a spice blend is fully integrated into your oil before it hits the pan; you want total coverage to prevent the structural “cracks” from showing through later.
Once the tape is seated, the real magic happens when you learn how to use joint compound to bridge the gap between the tape and the surrounding wall. Apply the compound in thin, sweeping motions, feathering the edges outward so the transition becomes almost invisible to the eye. If you’re working on older homes, you might find yourself fixing holes in plaster walls, which requires an even gentler touch to respect the aged texture. Precision here is everything—treat it with the same respect you’d give a delicate reduction, and your wall will emerge seamless and beautiful.
The Secret Seasonings: Pro-Tips for a Flawless Finish
- Don’t rush the drying process; just as you wouldn’t pull a delicate reduction off the heat before the flavors have truly melded, you must allow each layer of compound to dry completely to avoid cracks and uneven textures.
- Think of sanding as the final seasoning of a dish—less is more. Use a fine-grit sandpaper and light, circular motions to smooth the surface, ensuring you don’t sand away the very structure you just worked so hard to build.
- Always aim for “feathering” your edges. Instead of leaving a thick ridge of compound, spread it outward so the transition from the patch to the original wall is as seamless and subtle as a well-balanced fusion sauce.
- Keep your tools pristine. A tiny bit of dried, crusty compound on your putty knife is like a stray peppercorn in a smooth purée—it will leave unwanted textures and imperfections behind in your work.
- Test your work with a flashlight held parallel to the wall. This “grazing light” technique is my favorite way to spot hidden bumps or divots, much like how a chef inspects a plate under bright lights to ensure every garnish is perfectly placed.
The Final Flourish: Polishing Your Masterpiece
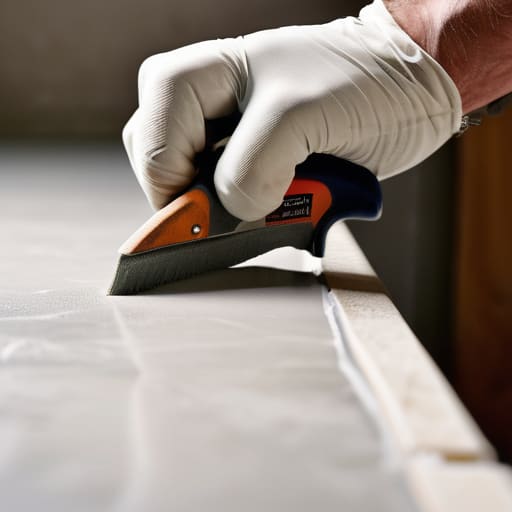
As we bring this project to a close, remember that repairing a wall is much like balancing a complex mole sauce—it’s all about the layers. We’ve moved from selecting your essential tools to the delicate precision of applying that mesh tape, ensuring the foundation is as solid as a well-rested dough. By carefully sanding your patches and applying that final, smooth coat of compound, you aren’t just covering up a mistake; you are restoring the structural integrity and visual flow of your living space. Take your time with those final sanding strokes, ensuring the surface is as seamless as a professional chef’s mise en place, because a smooth finish is what truly separates a quick fix from a culinary-grade restoration.
At the end of the day, our homes, much like our favorite recipes, are living tapestries that bear the marks of our journeys. A small hole in the wall isn’t a flaw to be ashamed of; it’s simply a part of the story of how we live, move, and grow within our spaces. Don’t let a little bit of drywall damage dampen your spirit or your decor. Instead, view it as an opportunity to practice patience and craftsmanship. Once that final layer of paint dries, your wall will be ready to host new memories, proving that with a little bit of soul and the right technique, we can transform any imperfection into a beautiful, seamless part of our home’s history.